REST API에 서비스 계층을 추가해보고 문제 생기면 트랜잭션을 이용해 롤백하는 방법 알아보기
12. 1 서비스와 트랜잭션의 개념
✔️ 서비스(service)
컨트롤러와 리포지토리 사이에 위치하는 계층으로, 서버의 핵심 기능(비즈니스 로직)을 처리하는 순서 총괄
✔️ 트랜잭션(transaction)
모두 성공해야 하는 일련의 과정; 트랜잭션 단위로 서비스 업무 처리 진행
e.g. 식당 예약에서 결제를 실패하면 이전까지 진행해도 모두 취소되어야 한다. -> 트랜잭션
트랜잭션이 실패로 돌아갈 경우 진행 초기로 돌리는 것이 롤백(rollback)!
REST 컨트롤러로 서비스 컨트롤러 확인하기
// 컨트롤러 역할: 클라이언트 요청받기
@PatchMapping("/api/articles/{id}")
public ResponseEntity<Article> update(@PathVariable Long id, @RequestBody ArticleForm dto){

    // 서비스 역할: 리포지토리에 데이터 가져오도록 명령하기
    // 1. DTO -> 엔티티 변환하기
    Article article = dto.toEntity();
    log.info("id: {}, article: {}", id, article.toString());
    // 2. 타깃 조회하기
    Article target = articleRepository.findById(id).orElse(null);
    // 3. 잘못된 요청 처리하기
    if (target == null || id != article.getId()){
        log.info("잘못된 요청! id: {}, article: {}", id, article.toString());
        return ResponseEntity.status(HttpStatus.BAD_REQUEST).body(null);
    }
    // 4. 업데이트 및 정상 응답(200) 하기
    target.patch(article);
    Article updated = articleRepository.save(target);

    // 컨트롤러 역할: 클라이언트에 응답하기
    return ResponseEntity.status(HttpStatus.OK).body(updated);
}
일반적으로 웹 서비스는 컨트롤러와 리포지토리 사이에 서비스 계층을 둬서 역할을 분업한다. (위 코드는 간단해서 1인 2역 가능)
12.2 서비스 계층 만들기
서비스 계층 추가해 컨트롤러, 서비스, 리포지토리 역할 분업하기
✔️ 서비스 클래스 생성하기
@Autowired 어노테이션으로 리포지토리와 협업할 수 있도록 articleRepository 객체 주입
12.2.1 게시글 조회 요청 개선하기
📍모든 게시글 조회 요청 개선하기
- 기존: /api/articles 로 요청이 들어옴 ➡️ 리포지토리 통해 데이터 가져옴
- 서비스 이용해 return articleService.index()로 가져오기
@GetMapping("/api/articles") // URL 요청 접수
public List<Article> index(){
    return articleService.index();
}
    public List<Article> index() {
        // 데이터는 리포지토리를 통해 가져온다
        return articleRepository.findAll();
    }
📍단일 게시글 조회 요청 개선하기
: 리포지토리와 컨트롤러가 만날 일 없이 서비스가 조회 요청 처리하도록 수정
    // 단일 게시글 조회하기
    @GetMapping("/api/articles/{id}") // URL 요청 접수
    public Article show(@PathVariable Long id){
        return articleService.show(id);
    }
public Article show(Long id) {
return articleRepository.findById(id).orElse(null);
}
12.2.2 게시글 생성 요청 개선하기
// POST
@PostMapping("/api/articles")
public ResponseEntity<Article> create(@RequestBody ArticleForm dto){
// 반환형이 Article인 create() 정의 후 수정할 데이터를 dto로 받음
Article created = articleService.create(dto);
return (created != null) ?
ResponseEntity.status(HttpStatus.OK).body(created) :
ResponseEntity.status(HttpStatus.BAD_REQUEST).build();
}- article로 하면 헷갈리니깐 created로 객체 이름을 변경한다.
public Article create(ArticleForm dto) {
// dto -> 엔티티로 변환 후 article에 저장
Article article = dto.toEntity();
if (article.getId() != null){
return null;
}
// article을 DB에 저장
return articleRepository.save(article);
}
- POST 요청은 수정하는 것이 아닌 생성하는 요청이므로 id가 존재한다면(id 저절로 생성해 주기 때문에) null을 반환한다.
12.2.3 게시글 수정 요청하기
// PATCH
@PatchMapping("/api/articles/{id}")
public ResponseEntity<Article> update(@PathVariable Long id, @RequestBody ArticleForm dto){
Article updated = articleService.update(id, dto);
return (updated != null) ?
ResponseEntity.status(HttpStatus.OK).body(updated):
ResponseEntity.status(HttpStatus.BAD_REQUEST).build();
}서비스계층을 추가하니 코드가 훨씬 짧아진 것을 확인할 수 있었다.
➡️ 컨트롤러는 서비스에 어떤 지시를 하고 어떤 데이터를 받아 오는지만 알면 된다. (작업은 서비스가)
public Article update(Long id, ArticleForm dto) {
// 1. DTO -> 엔티티 변환하기
Article article = dto.toEntity();
log.info("id: {}, article: {}", id, article.toString());
// 2. 타깃 조회하기
Article target = articleRepository.findById(id).orElse(null);
// 3. 잘못된 요청 처리하기
if (target == null || id != article.getId()){
log.info("잘못된 요청! id: {}, article: {}", id, article.toString());
return null;
}
// 4. 업데이트 및 정상 응답(200) 하기
target.patch(article);
Article updated = articleRepository.save(target);
return updated; // 응답은 컨트롤러가 하므로 수정 엔티티만 반환
}
12.2.4 게시글 삭제 요청 개선하기
// DELETE
@DeleteMapping("/api/articles/{id}")
public ResponseEntity<Article> delete(@PathVariable Long id){
Article deleted = articleService.delete(id);
return (deleted != null) ?
ResponseEntity.status(HttpStatus.NO_CONTENT).build():
ResponseEntity.status(HttpStatus.BAD_REQUEST).build();
}- deleted에 내용 있으면 상태에 NO_CONTENT 보내고 본문 빌드
- deleted에 내용 없으면 삭제 못한거니까 BAD_REQUEST 하고 본문 빌드
public Article delete(Long id) {
// 1. 대상 찾기
Article target = articleRepository.findById(id).orElse(null);
// 2. 잘못된 요청 처리하기
if (target == null){
return null;
}
// 3. 대상 삭제하기
articleRepository.delete(target);
return target; // 보내줘야 if문 사용가능
}- 역시나 상태와 본문 실어 보내는건 컨트롤러 일이니까 여기서는 null
- 삭제할 대상 있으면 삭제하고, target은 보내준다
- 그래야 deleted != null 로 조건문 이용 가능
12.3 트랜잭션 맛보기
[시나리오]
- 게시판에 데이터 3개 한꺼번에 생성 요청하기
- 데이터를 DB에 저장하는 과정에서 의도적으로 오류 발생시키기
- 어떻게 롤백되는지 확인하기
1. REST 컨트롤러가 2개의 요청 받아 결과 응답하도록 ArticleApiController에 transactionTest() 메서드 추가
2. 컨트롤러는 요청 결과 반환 / 서비스에 createArticles()메서드 작성
3. 강제 예외상황 발생: findById()로 id가 -1인 데이터 받기 - id는 음수가 될 수 없다.
@PostMapping("/api/transaction-test")
public ResponseEntity<List<Article>> transactionTest(@RequestBody List<ArticleForm> dtos){
List<Article> createdList = articleService.createArticles(dtos);
return (createdList != null) ?
ResponseEntity.status(HttpStatus.OK).body(createdList):
ResponseEntity.status(HttpStatus.BAD_REQUEST).build();
} public List<Article> createArticles(List<ArticleForm> dtos) {
// 1. dto 묶음을 엔티티 묶음으로 반환하기
List<Article> articleList = dtos.stream()
.map(dto -> dto.toEntity())
.collect(Collectors.toList());
// 2. 엔티티 묶음을 DB에 저장하기
articleList.stream()
.forEach(article -> articleRepository.save(article));
// 3. 강제 예외 발생시키기
articleRepository.findById(-1L)
.orElseThrow(() -> new IllegalArgumentException("결제 실패!"));
// 4. 결과 값 반환하기
return articleList;
}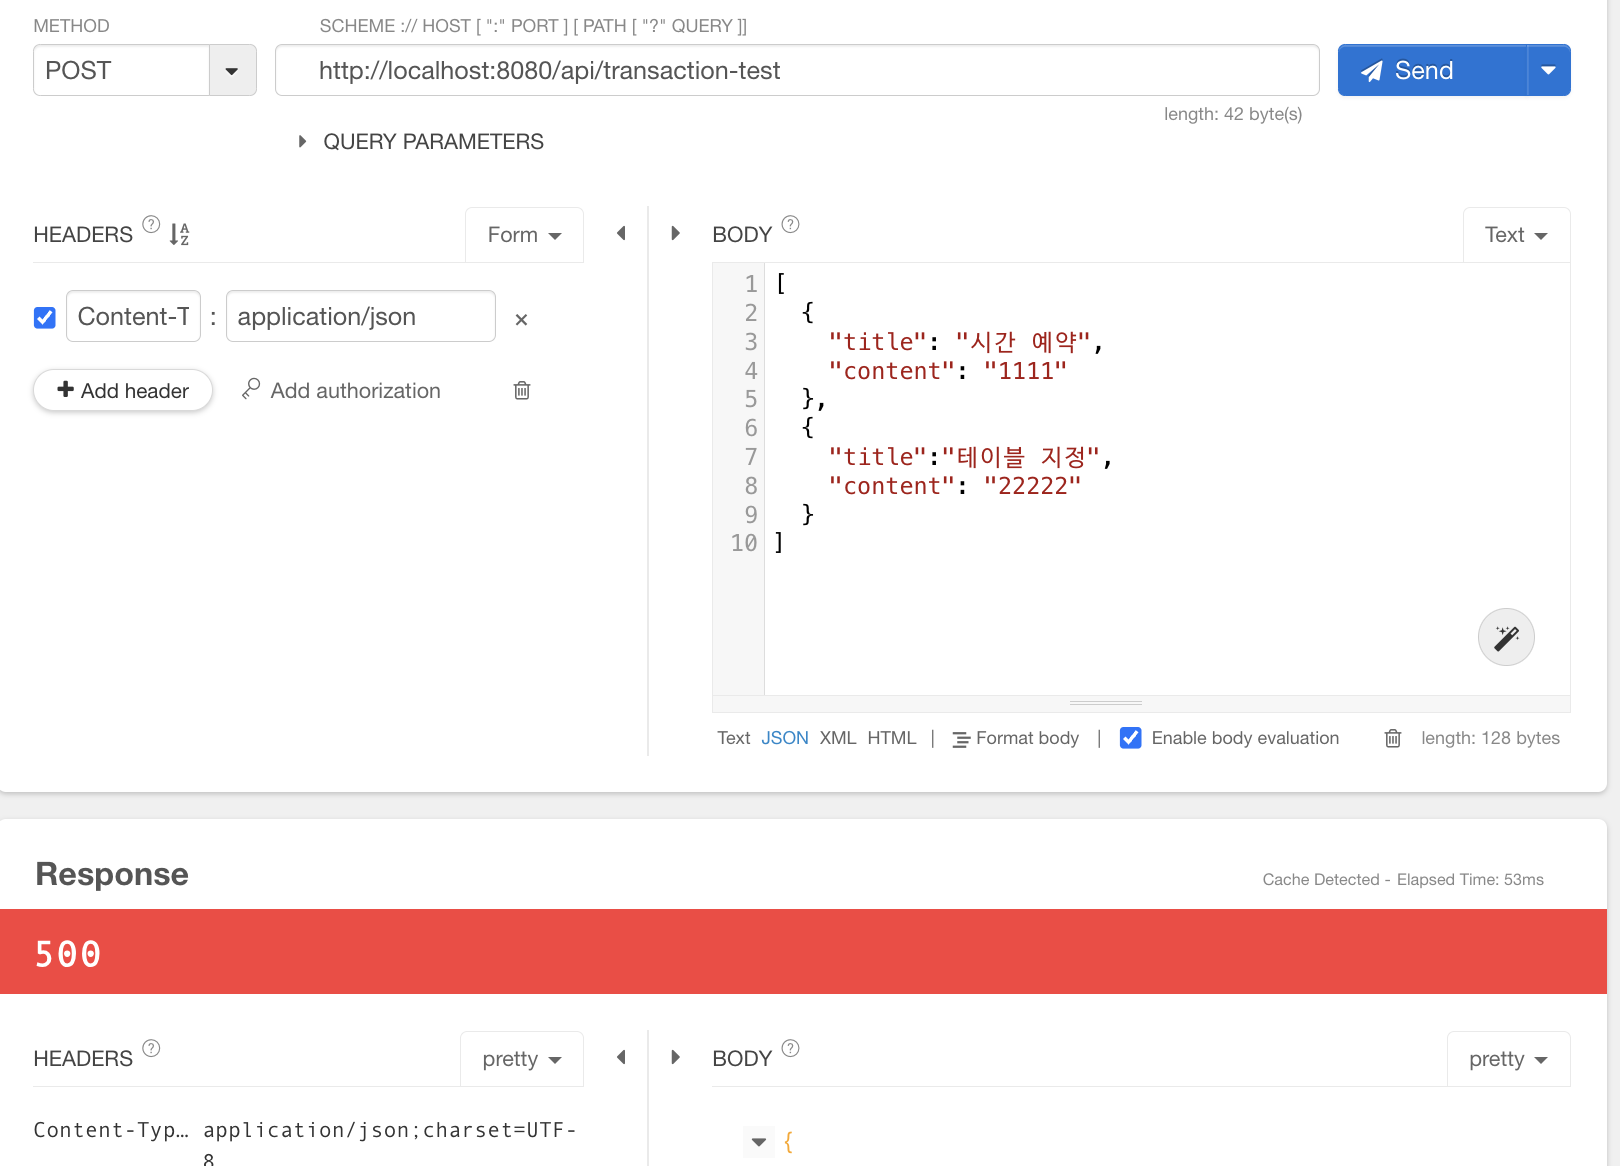
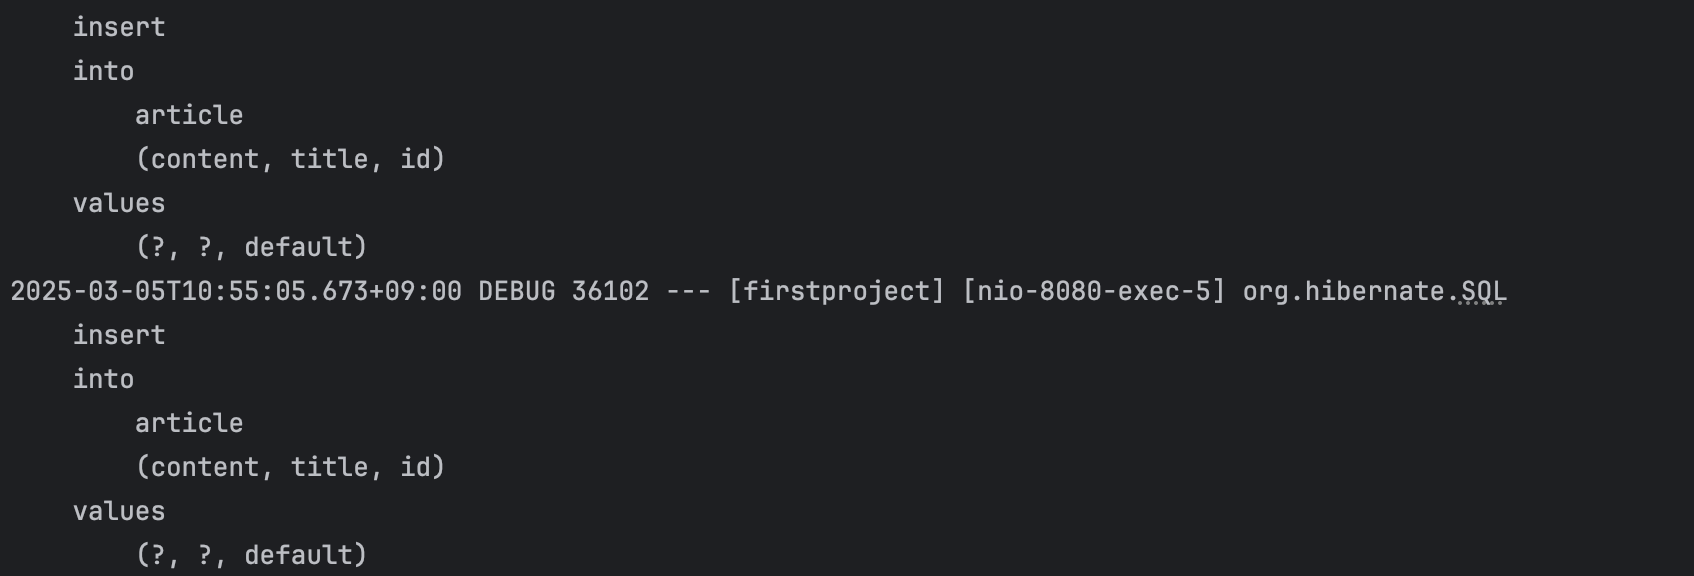
서버에서 예외 상황 발생시켰기때문에 상태코드 500

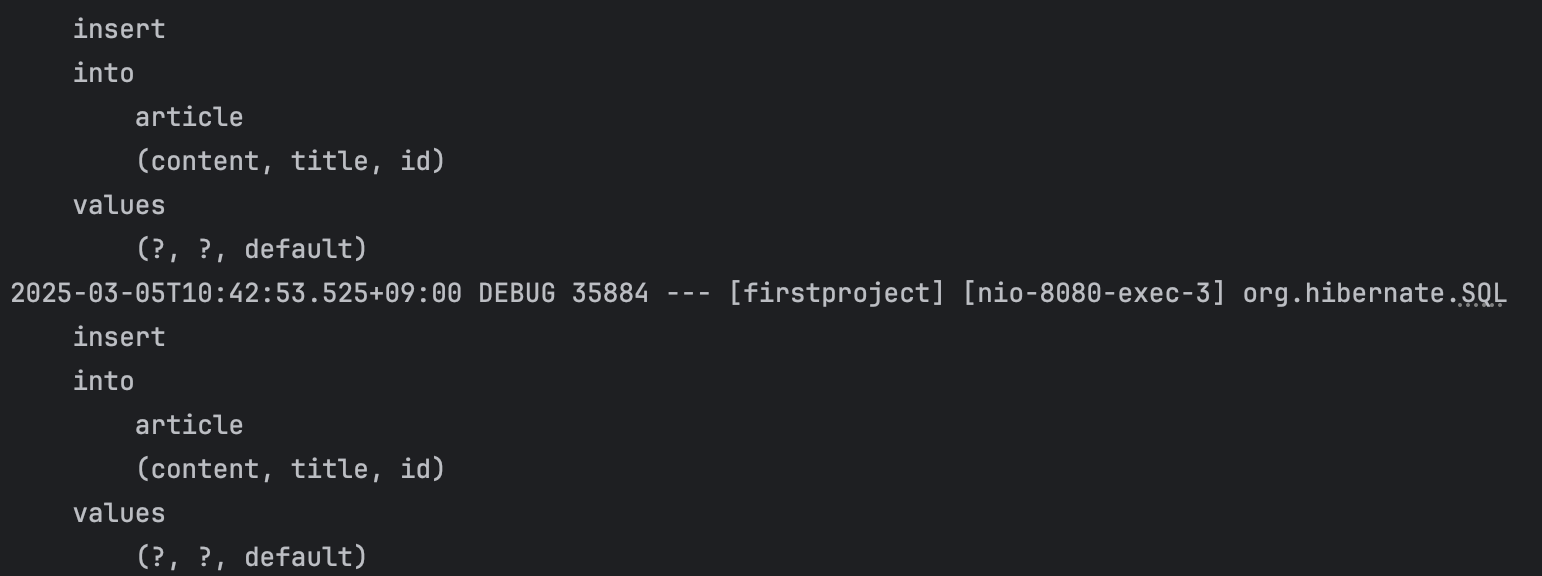
결제 실패 메세지 확인 전에 INSERT문이 2번 수행된 것을 확인할 수 있다 -> DB에 데이터가 생성되긴 했다.
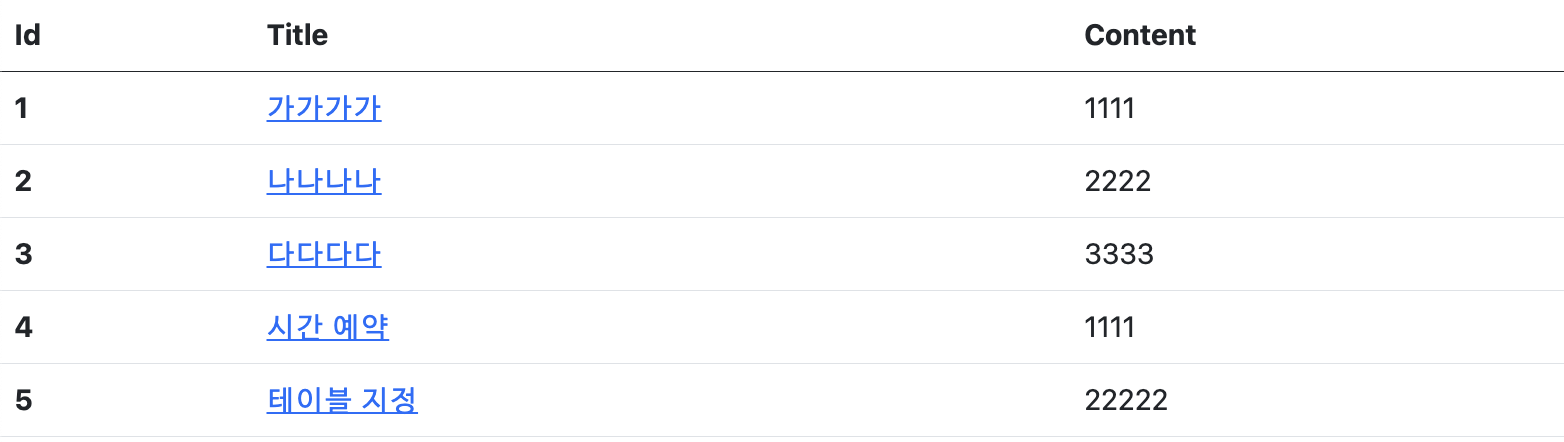
-> DB에 데이터가 생성된 것을 확인할 수 있다.
근데 오류가 떴는데 데이터가 생성되면 안되니깐 데이터 생성 실패 이전 상황으로 되돌리기 위해 트랜잭션을 선언한다.
트랜잭션은 서비스에서 관리: 서비스의 메서드에 @Transactional을 붙이면 해당 메서드가 하나의 트랜잭션으로 묶임
✔️ @Transactional 처리 해준다면 롤백을 통해 이전 상태로 돌아갈 수 있다.
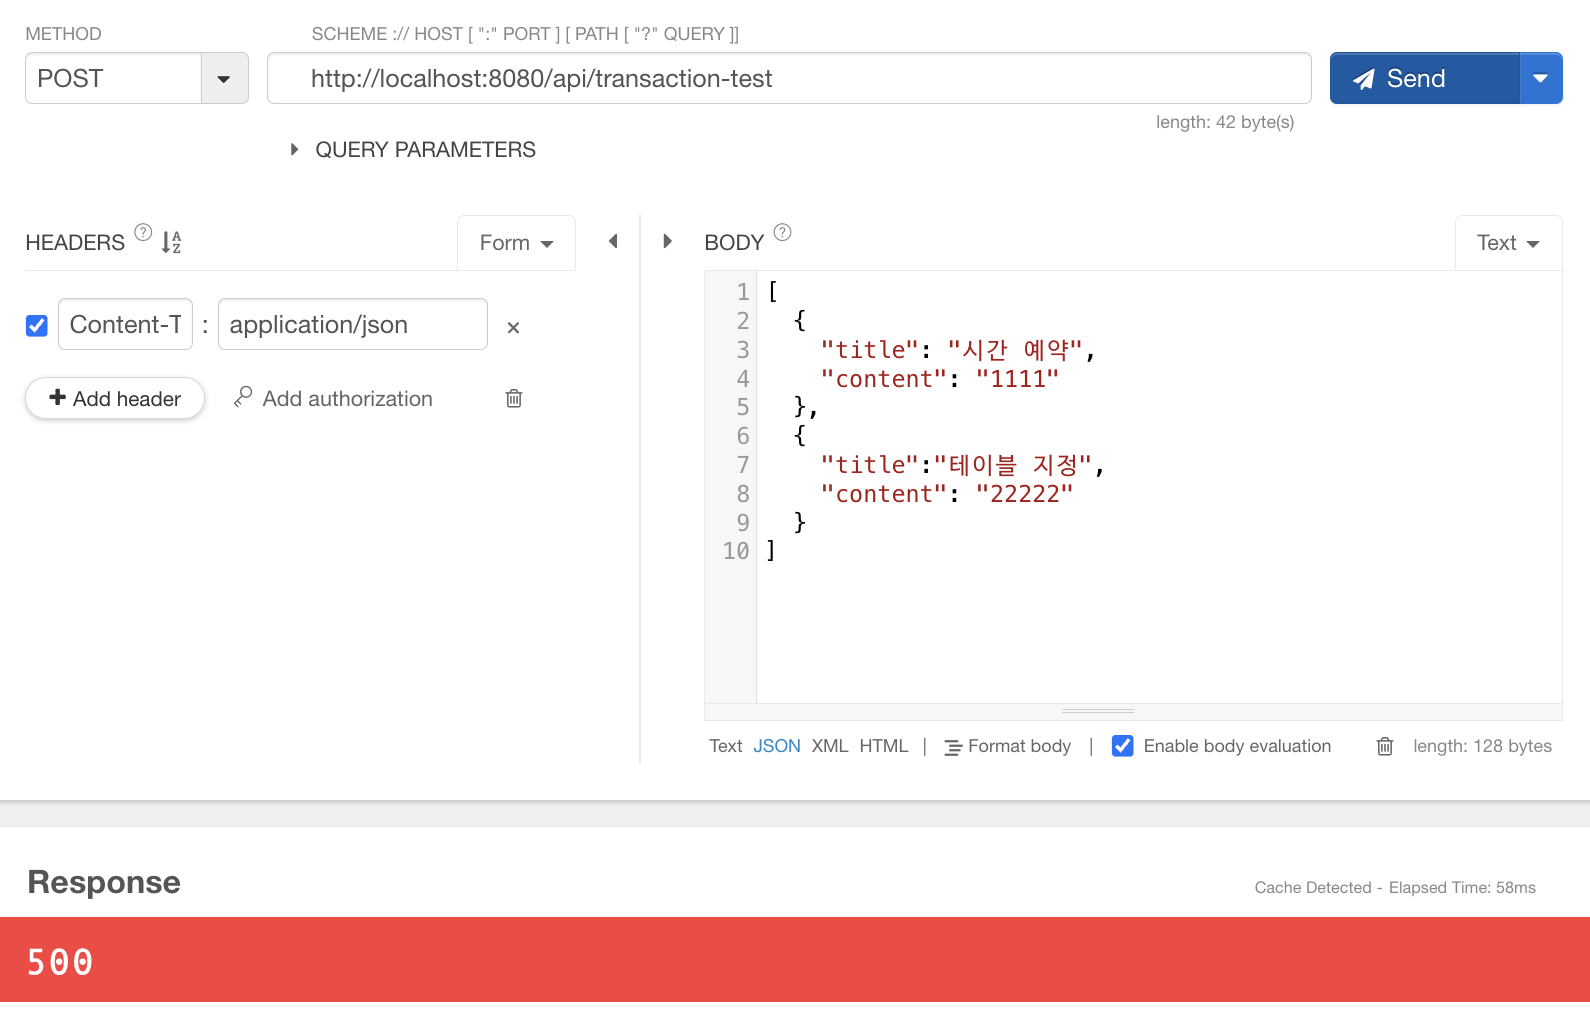
INSERT문이 두번 실행되기는 함

결제 실패 메세지 출력됐는데 게시판에 데이터가 추가됐는지 아닌지 확인해보면
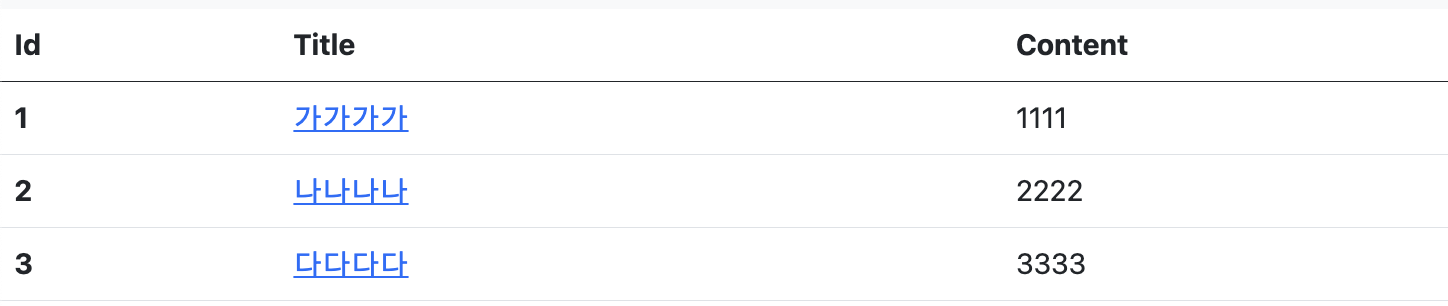
추가된 데이터가 없는 것을 확인할 수 있었다. (기본 데이터만 있음)
📌 셀프 체크
✔️ CoffeeController
package com.example.firstproject.api;
import com.example.firstproject.dto.CoffeeDto;
import com.example.firstproject.entity.Coffee;
import com.example.firstproject.repository.CoffeeRepository;
import com.example.firstproject.service.CoffeeService;
import org.apache.coyote.Response;
import org.springframework.beans.factory.annotation.Autowired;
import org.springframework.http.HttpStatus;
import org.springframework.http.RequestEntity;
import org.springframework.http.ResponseEntity;
import org.springframework.web.bind.annotation.*;
import java.util.List;
@RestController
public class CoffeeApiController {
@Autowired
private CoffeeService coffeeService;
// GET
// 전체 메뉴 조회하기
@GetMapping("/api/coffee")
public List<Coffee> index(){
return coffeeService.index();
}
// 단일 게시글 조회하기
@GetMapping("/api/coffee/{id}")
public Coffee show(@PathVariable Long id){
return coffeeService.show(id);
}
// POST
@PostMapping("/api/coffee")
public ResponseEntity<Coffee> create(@RequestBody CoffeeDto dto){
// DTO 받아와서 엔티티로 변경하기
Coffee created = coffeeService.create(dto);
return (created != null)?
ResponseEntity.status(HttpStatus.OK).body(created):
ResponseEntity.status(HttpStatus.BAD_REQUEST).build();
}
// PATCH
@PatchMapping("/api/coffee/{id}")
public ResponseEntity<Coffee> update(@PathVariable Long id, @RequestBody CoffeeDto dto){
Coffee updated = coffeeService.update(id, dto);
return (updated != null) ?
ResponseEntity.status(HttpStatus.OK).body(updated):
ResponseEntity.status(HttpStatus.BAD_REQUEST).build();
}
// DELETE
@DeleteMapping("/api/coffee/{id}")
public ResponseEntity<Coffee> delete(@PathVariable Long id){
Coffee deleted = coffeeService.delete(id);
return (deleted != null) ?
ResponseEntity.status(HttpStatus.NO_CONTENT).build():
ResponseEntity.status(HttpStatus.BAD_REQUEST).build();
}
}
✔️ 서비스 추가
package com.example.firstproject.service;
import com.example.firstproject.dto.ArticleForm;
import com.example.firstproject.entity.Article;
import com.example.firstproject.repository.ArticleRepository;
import jakarta.transaction.Transactional;
import lombok.extern.slf4j.Slf4j;
import org.springframework.beans.factory.annotation.Autowired;
import org.springframework.http.HttpStatus;
import org.springframework.http.ResponseEntity;
import org.springframework.stereotype.Service;
import org.springframework.web.bind.annotation.PostMapping;
import org.springframework.web.bind.annotation.RequestBody;
import org.springframework.web.bind.annotation.ResponseStatus;
import java.util.List;
import java.util.stream.Collectors;
@Slf4j
@Service // 서비스 객체 생성
public class ArticleService {
@Autowired
private ArticleRepository articleRepository;
public List<Article> index() {
// 데이터는 리포지토리를 통해 가져온다
return articleRepository.findAll();
}
    public Article show(Long id) {
        return articleRepository.findById(id).orElse(null);
    }
public Article create(ArticleForm dto) {
    // dto -> 엔티티로 변환 후 article에 저장
    Article article = dto.toEntity();
    if (article.getId() != null){
        return null;
    }
    // article을 DB에 저장
    return articleRepository.save(article);
}
public Article update(Long id, ArticleForm dto) {
// 1. DTO -> 엔티티 변환하기
Article article = dto.toEntity();
log.info("id: {}, article: {}", id, article.toString());
// 2. 타깃 조회하기
Article target = articleRepository.findById(id).orElse(null);
// 3. 잘못된 요청 처리하기
if (target == null || id != article.getId()){
log.info("잘못된 요청! id: {}, article: {}", id, article.toString());
return null;
}
// 4. 업데이트 및 정상 응답(200) 하기
target.patch(article);
Article updated = articleRepository.save(target);
return null;
}
    public Article delete(Long id) {
        // 1. 대상 찾기
        Article target = articleRepository.findById(id).orElse(null);
        // 2. 잘못된 요청 처리하기
        if (target == null){
            return null;
        }
        // 3. 대상 삭제하기
        articleRepository.delete(target);
        return target; // 보내줘야 if문 사용가능
    }
@Transactional
    public List<Article> createArticles(List<ArticleForm> dtos) {
        // 1. dto 묶음을 엔티티 묶음으로 반환하기
        List<Article> articleList = dtos.stream()
                .map(dto -> dto.toEntity())
                .collect(Collectors.toList());
        // 2. 엔티티 묶음을 DB에 저장하기
        articleList.stream()
                .forEach(article -> articleRepository.save(article));
        // 3. 강제 예외 발생시키기
        articleRepository.findById(-1L)
                .orElseThrow(() -> new IllegalArgumentException("결제 실패!"));
        // 4. 결과 값 반환하기
        return articleList;
    }
}'CS > 스프링부트3 자바 백엔드 개발 입문' 카테고리의 다른 글
| [댓글 CRUD 만들기] 14장 | 댓글 엔티티와 리포지토리 만들기 (1) | 2025.03.08 |
|---|---|
| [REST API와 테스트 코드 작성하기] 13장 | 테스트 코드 작성하기 (0) | 2025.03.06 |
| [REST API와 테스트 코드 작성하기] 11장 | HTTP와 REST 컨트롤러 (0) | 2025.03.01 |
| [REST API와 테스트 코드 작성하기] 10장 | REST API와 JSON (0) | 2025.02.27 |
| [게시판 CRUD 만들기] 9장 | CRUD와 SQL 쿼리 종합 (0) | 2025.02.27 |